In preparation for this weekend’s Mar Vista Green Garden Showcase , I wanted to create a display that demonstrates how wall gardens are yet another way to grow food in small spaces. So I took up the challenge of figuring out how to hang Woolly Pockets on my backyard fence that is completely destroyed by termites and is hanging on by wishful thinking and wire.
Ordinarily Woolly Pockets can be attached to any wall, but this fence is special (as in “short bus” special). Luckily the neighbors behind us have a chain link fence that backs up to our fence, so I knew we could use that for stronger support. There’s a 6″ gap between the two fences. So a special bracket would be required. Idea: affix the Woolly Pockets to a plywood board, and hand the board over the chain link fence (and ours) with a large hook. I came up with this with the help of the handy guys at Home Depot:
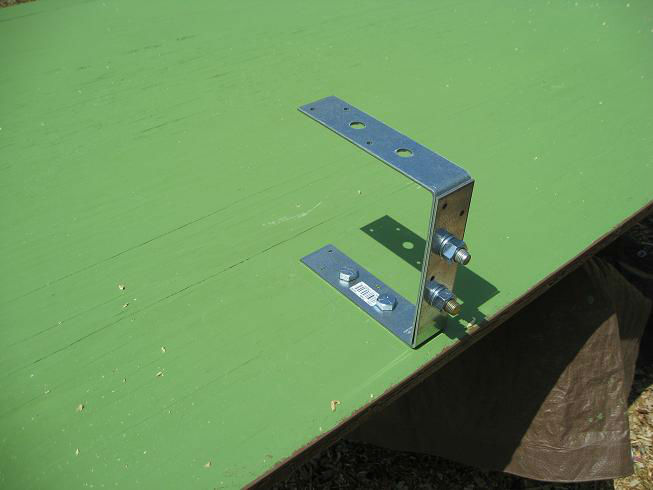
Two L-brackets with 7/16th nuts and bolts holding them together
We drilled holes in the back of the plywood board and bolted the bracket with washers to keep it from pulling through the wood under the weight of the pockets (remember, soil can weigh a lot when it’s wet). We had painted the board with an ugly green color to save on paint, then used a more eye-friendly brown on the right side for a second coat.
We had our plants on hand already:
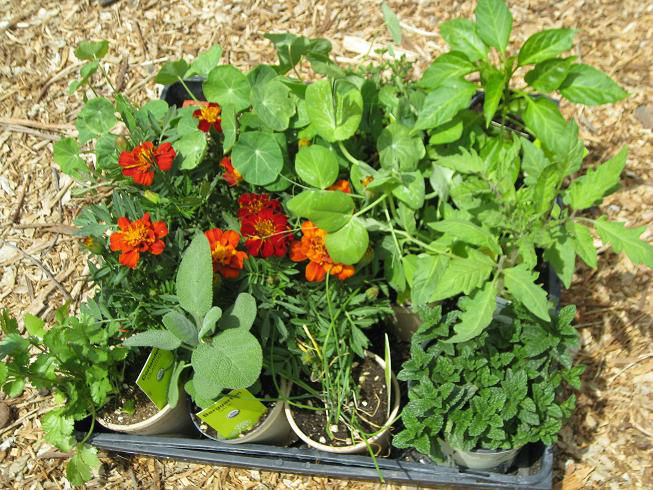
Marigolds, Nasturtiums, Peas, Sage, Chives, Cilantro, Moroccan Mint, and an experimental tomato and pepper
Next I followed instructions on how to attach the Woolly Pockets to the board (oh – wait, first we tested the board and it hung perfectly on the fence without any difficulty at all – Success #1!) I attached 4 rows of Wally Threes to the board (this image shows it part way through)
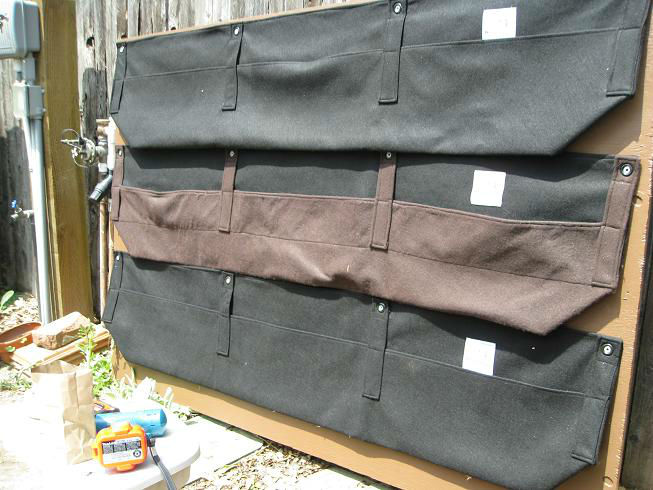
The fourth row of Pockets will hang right along that last area of exposed wood
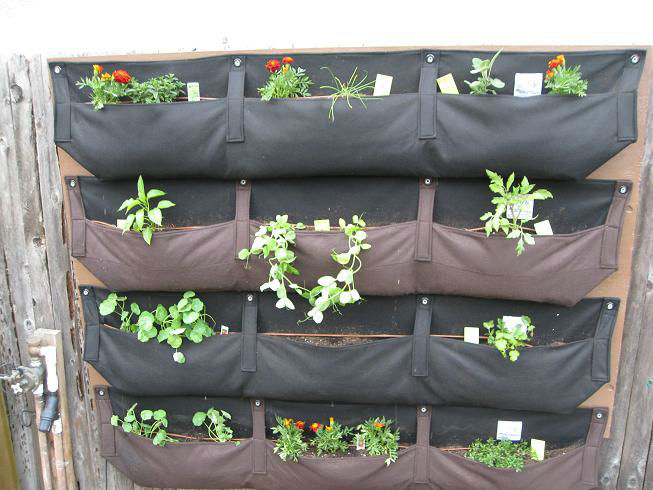
Next, I filled the pockets with Gardener’s Gold and planted the transplants in a few minutes:
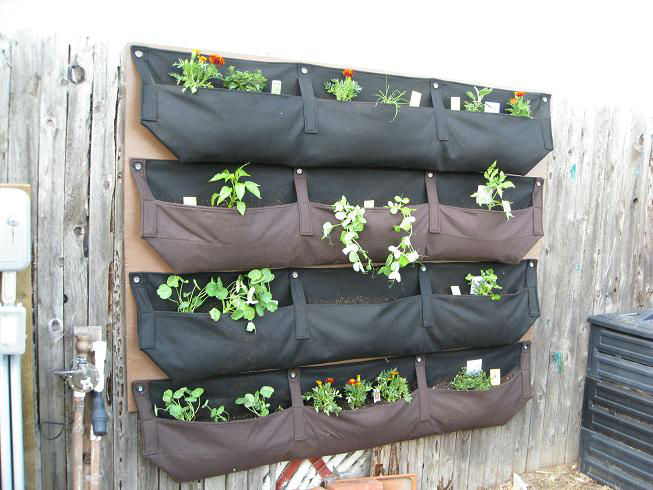
It actually hid part of the fence (at the bottom) that had been eaten away by some vicious animal in our neighborhood. The red and white strips show the neighbor’s chain link fence poking through. Next stop – irrigation.
I bought a timer, and adapter and some connectors and end plugs (A.K.A. Goof plugs) for 1/4″ tubing.
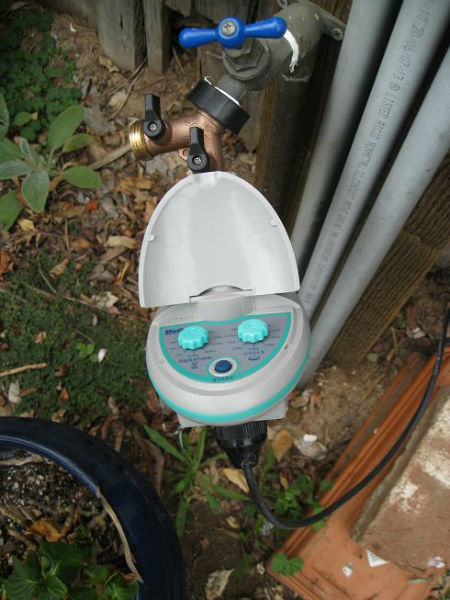
Handy timer that allows you to choose how often and how long to water. There’s also a setting for rain delay.
If you poke a hole through the back of the pockets, which are fabric so it’s easy to do, you can thread the 1/4″ tubing right through and it’s almost invisible. I ran the tubing up from the timer, (see the adapter at the bottom of the timer), behind the pockets, then used a T-connector to send out horizontal drip lines across all the pockets:
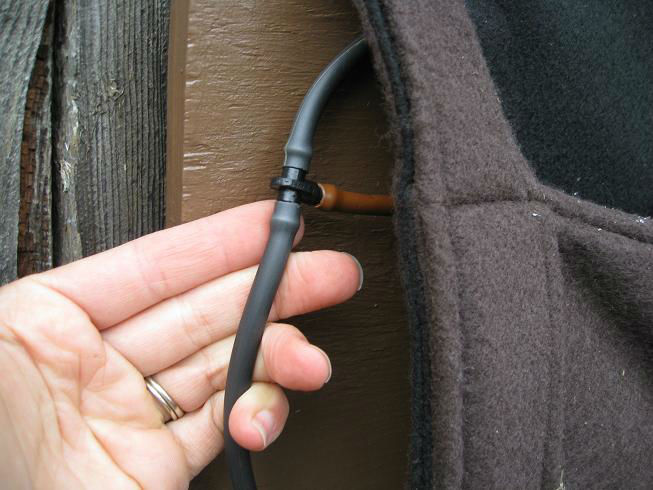
In the end, you can hardly see the irrigation, except across the soil at the top of each pocket, and that could be buried if you wanted to do that. I prefer to see how my watering is working.
So now I have 12 extra places to grow herbs, veggies and flowers this season. If you’re going to be in the Mar Vista area, you can come by and see what it looks like. We’re on Tour #5.


What an amazing idea. I’m going to fwraord your blogpost to my best friend who has a tiny garden and loves growing her own herbs and veggies! Thanks for sharing!
Hi, thanks for posting about us! We thought these Woolly Pocket videos might interest you!
http://www.youtube.com/watch?v=5A_oYFurxt8
http://www.youtube.com/watch?v=UP4p4KQl0YA
Woolly Yours,
Aurora
aurora at woollypocket dot com
Wow that’s a really cool idea. It keeps it up off the ground away from critters. I had no idea you could do that. It would definitely be a conversation starter.