As a birthday present to myself, I purchased some redwood seed flats from Bountiful Gardens, the home of Ecology Action in Willits, CA. These redwood seed flats allow gardeners to start seeds very close together without the occasionally tedious limitation of trays with cells. These open “half flats” (which I purchased instead of the full size flats that are twice as large and twice as heavy) can hold up to 87 seedlings in the same amount of space as my other seed flats that hold 24. It’s a new freedom for me!
So last night I attempted to assemble the flats that arrived in the mail bundled together in pieces. The diagram shows how the flat is put together, but there are no written instructions that might indicate any particular order in which to assemble the flats. Realizing this was just the first step into what I will call the Seed Flat Folly…
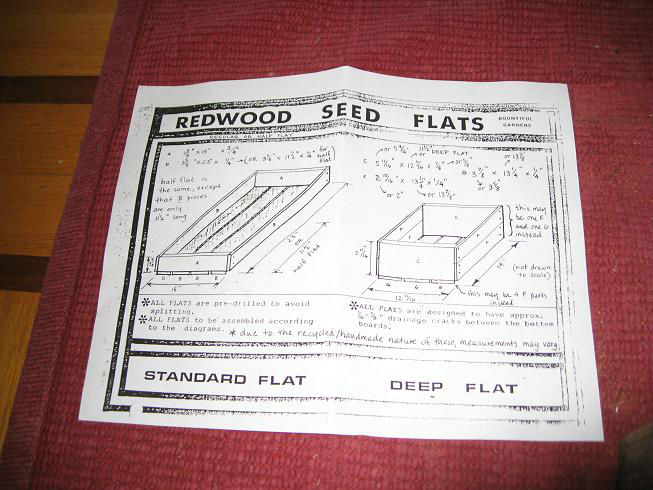
Notice there’s plenty of writing on the page, but the lack of step by step instructions leaves one questioning…
Let it be known that, while I may be clumsy in sports, I come from a family of carpenters and am relatively self-assured around tools. Knowing this will come in handy in a moment.
The materials come pre-drilled to prevent splitting. What they don’t tell you is that only some of the materials are pre-drilled to prevent splitting. This information will also come in handy in a moment.
The first seed flat came together with relative ease.
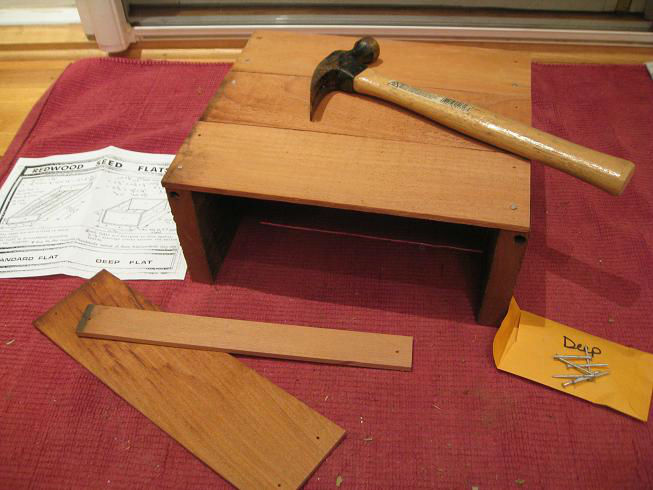
Deep Seed Flat partially assembled
With the confidence of having assembled the first flat with little difficulty, I heartily began on the second flat. It proved more challenging. As it turns out, the two large redwood end pieces are not pre-drilled, only the smaller slat pieces are. Here’s what it looks like when your 1 1/2″ nail only goes in to a rock-hard impenetrable piece of redwood half way.
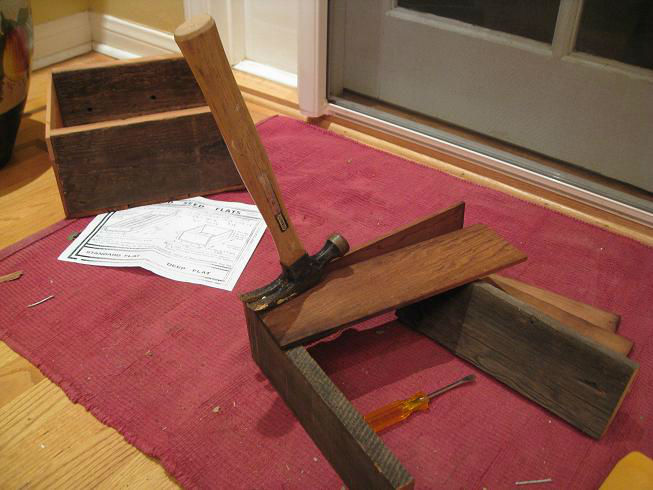
Hammer wedged under a stubborn nail that wouldn’t go in, nor come out.
After splitting several slats of wood to get the pieces apart, I pre-drilled the rest of the holes with my trusty Makita cordless hand drill. Even after doing that, however, I still had to bend half of the nails over because they still wouldn’t go into their holes. It felt really good to have a hammer in my hand in that moment.
Now, this may sound like a scathing review of the Bountiful Gardens seed flat, but it actually isn’t. It’s a gentle reminder to examine the potential design flaws of building products from unpredictable reclaimed lumber (are you listening Bountiful Gardens??) Word to the wise – pre-drill those end pieces! The seed flats themselves are fantastic and I was excited to put them to good use.
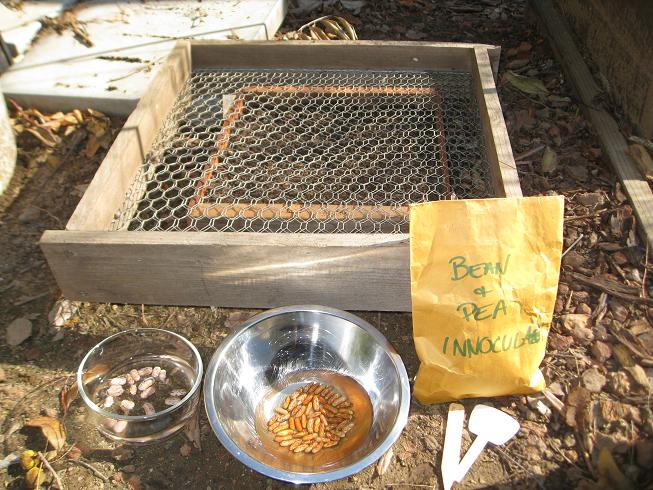
I did my calculations using the Master Charts in How to Grow More Vegetables, to figure out how many seeds I needed to start for my spring bean bed. I soaked the seeds overnight and assembled my supplies in the morning.
Haricot Vert and Dragon’s Tongue beans soaking in water, with inoculant to coat the seeds.
It is recommended to use 1-inch chicken wire as a guide for spacing in the seed flats, since it creates the perfect hexagonal spacing required for 1-inch centers in the Grow BioIntensive planting method. Since my compost sifter (shown above) is two layers of wire that overlap slightly, I eventually abandoned the idea of using it for spacing because the beans didn’t fit easily through the holes.
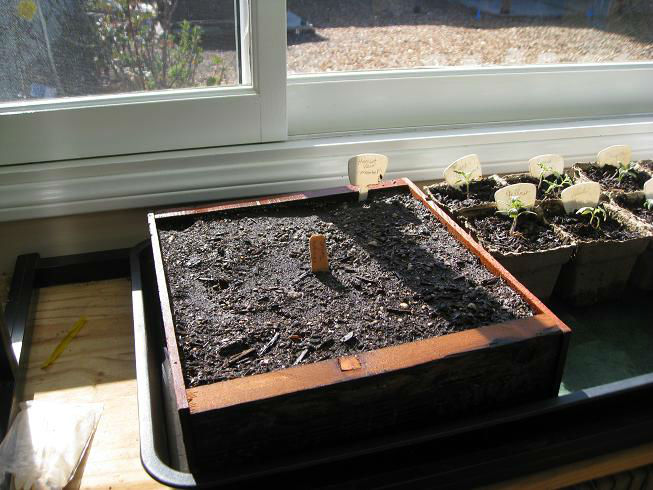
After mixing together compost and bed soil, laying in the seeds and pressing another layer of soil on top, I watered them gently and placed the seed flat on the growing table, next to the tomato seedlings that we transplanted this morning.
The half-sized flats are a perfect fit!
To be continued…

Pingback: Farewell Bountiful Gardens - Gardenerd
HI Jen, The flats have a couple of spaces in between boards to let water
in, but generally speaking, I water these flats from overhead. Last
year, I did set them on a capillary mat to soak up the water that leaks
through to the trough. It worked fairly well. The redwood flats are
pretty sturdy, and I think they would hold up okay in water. Just be sure to pre-drill your holes, or else the wood will split, making it less sturdy.
In the flat that you made – did you water from the bottom? It looks like you have a black plastic tub under the flat. I’m looking to make a wood flat and I’m not sure if it’s OK to submerge the bottom of it into water. Thanks!
You can get it from Peaceful Valley Farms:
Or from Bountiful Gardens for a smaller quantity:
Enjoy!
What do you use for your bean inoculant?
LOL I like your flats. Gives me ideas what to do with some IKEA “GORM” shelving I have. Thanks a lot for the post