
Moving right along in our series on raised beds, we have now come to the part where sweat and elbow grease come in handy.
After a trip to the hardware store to pick up a non-rusted blade for our dusty Skilsaw (keeping in mind that Trex Decking can dull blades faster than wood), a box of 3 inch galvanized deck screws, a roll of 4 foot x 25 foot galvanized poultry fencing, tin snips, and two carloads of Trex Decking (19 12 foot boards were needed for our job), we were ready to build our raised beds.
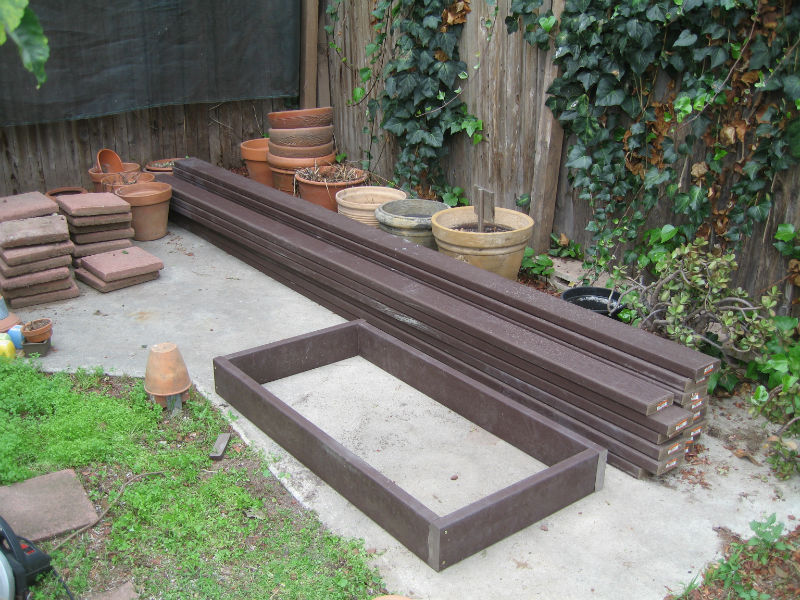
On Day 1 – we opted to cut and assemble the beds before clearing the space of the old raised beds. We had been advised to pre-drill the holes for the deck screws because Trex and other composite lumbers can split if drilled near the end of the board. We started with the easier rectangular beds before tackling the more complicated center beds of our design. 2 1/2 beds were built in about 3 hours before we had to stop for the day. Below you can see half a bed (because the complete beds are double stacked in the end) next to the stack of Trex.
Day 2 began with the realization that we wouldn’t be able to complete this project in one weekend without help. So we decided to hire out for the job. We made a return trip to Home Depot to buy 20 – 1/2″ diameter, 1 1/2 foot pipes (for securing the long sides of the beds together and into the ground to prevent warping); 20 pipe straps; 19 mending plates (see below); another box of deck screws; a box of 1″ screws for the pipe straps; and a couple of handy men to help out.
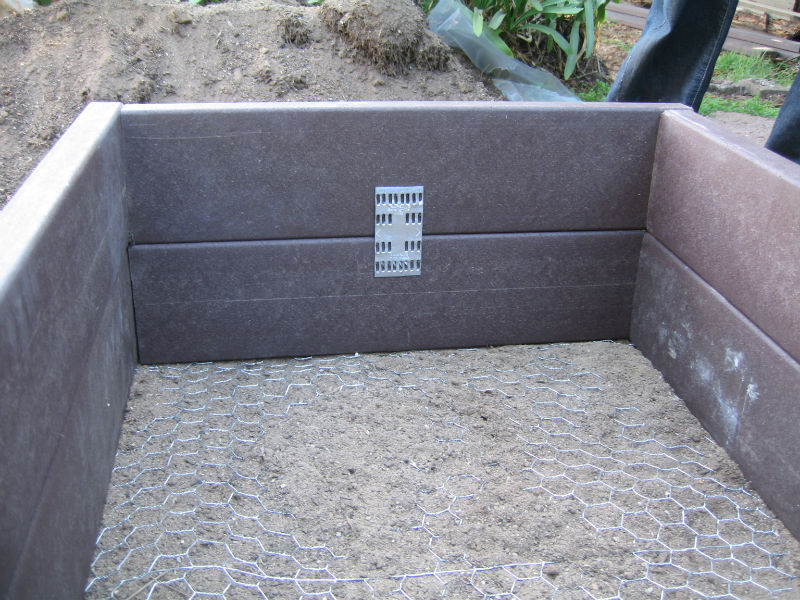
While we were busy measuring and cutting and assembling the remaining beds, we had the handy fellas break down the old beds and level the surface as best as possible. They shoveled soil on to plastic sheeting in the pathways. That took 2 guys about an hour. So we started involving them in the assembly of the other beds. They attached chicken wire on the bottom of the beds with a staple gun and hammered the mending plates on either side of the short ends of the beds.
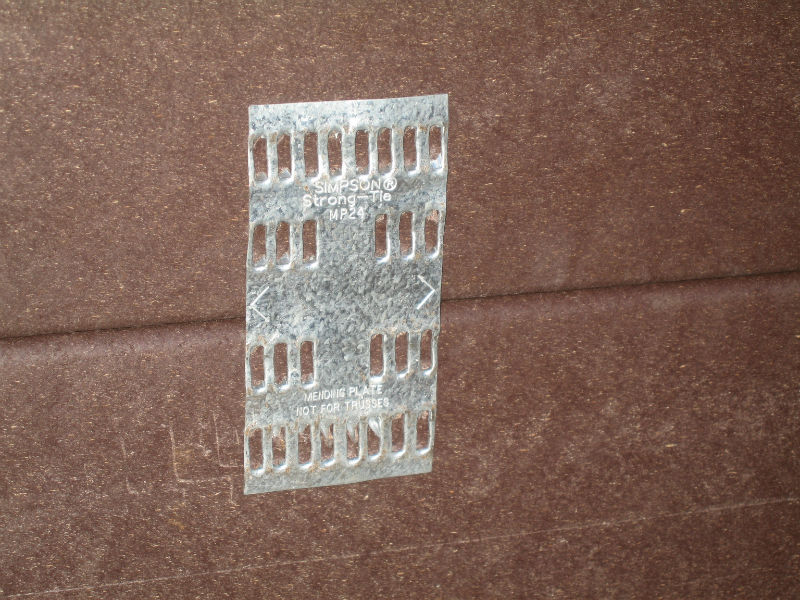
You can see a close up of the mending plate in the picture below. It has tines that drive into the wood and is specially designed to hold two pieces of wood together. Just hammer it into place and it holds really well.
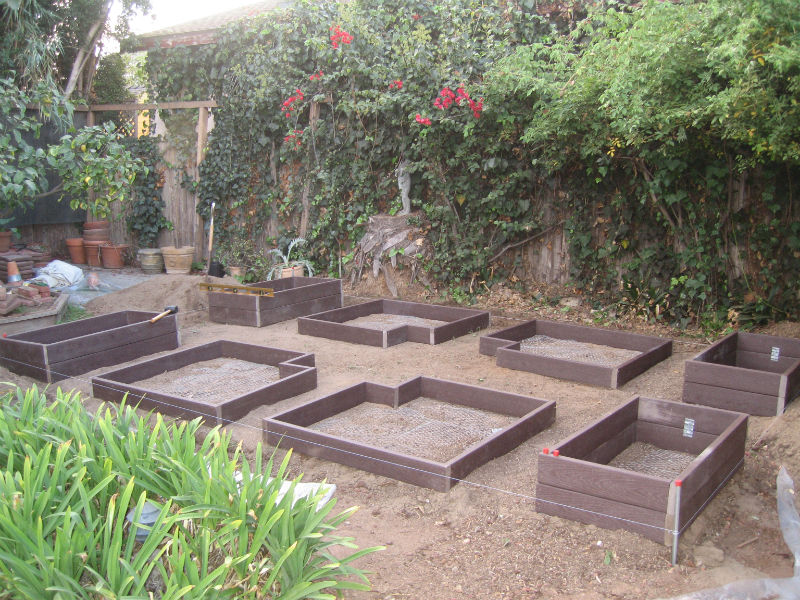
Next, we needed to place the beds in their new home. We drove 4 pipes into the ground at each corner of the garden and wrapped the perimeter with string. We pulled the rectangular beds into the outer corners and made room for the center arrangement. When all was said and done, it actually looked like the drawing and I breathed a huge sigh of relief that I hadn’t miscalculated my measurements.
At the end of the second day, we weren’t quite done assembling everything, but we might have been if we had started first thing in the morning. I think we didn’t get going until 11:00 on both Saturday and Sunday. This is where we were at the end of Day 2.
Even with it incomplete, as I stood in the middle of my creation, I felt an overwhelming feeling of being home. I couldn’t keep the smile off my face as the thought crept into my consciousness, “This is my dream garden.”


Pingback: Gardenerd: Organic Edible Gardening | Raised Beds - Part 2 - Design
Where did you find 2×6 Trex? All they have at the big box stores around me (Atlanta area) is the thinner decking material. Can you be more specific on the type of pipe you used, how deep you sunk them, and how you attached the pipes to the Trex?
Your garden looks beautiful!
-Dan
My wife is an avid gardener and I like it too and the hard clay in our yard just isn’t going to cut it.
We had to order 2×6 Trex at the contractor’s desk at Home Depot. They didn’t carry it, but it could be easily special ordered. The thinner stuff will definitely bend under the weight of soil and water. Go with the thicker material if you can wait for the order to come in.
At the time we used 1/2 inch galvanized metal pipe in 18 inch lengths. Then we used 1/2″ pipe strap to secure it to the top and bottom layers–two pieces of pipe strap per pipe. These days we use surveyor’s stakes instead, since they’re flat don’t require the pipe strap. They have holes for screws already and can be screwed straight into the wood. We used a mallet to hammer the pipe into the ground to that the top of the pipe was about an inch below the top level of the raised bed. It would be covered with soil when the box is full, so you won’t be able to see it.
I hope this helps!
Christy
Hi Leslie,
We used 2×6 Trex, which is braced with 1/2″ pipe every 2 feet, so this baby isn’t going anywhere. No bowing, no twisting, nothing. It looks just like the day we installed it. If you use the pipe or surveyor stakes, you don’t need any cross braces. We chose 2″ thickness to prevent bowing as well. This is sturdy stuff!
Hey Christy- I stumbled upon your blog while looking up plastic/composite lumber for building a raised bed. There is so much cool information here – not just on raised beds, but on everything garden related. You ROCK! I’m really looking forward to perusing your archives and picking up some new tips.
Question regarding the raised beds though: You went with the composite (which is the direction I was starting to lean), and it’s been 3+ years since you installed them – how are they performing? Have you had any problems yet? The design I’m thinking about would probably require cross-bracing because I know that the plastic and composite lumber tend to bow, but I’m wondering if there is anything else I should take into consideration.
Thanks!