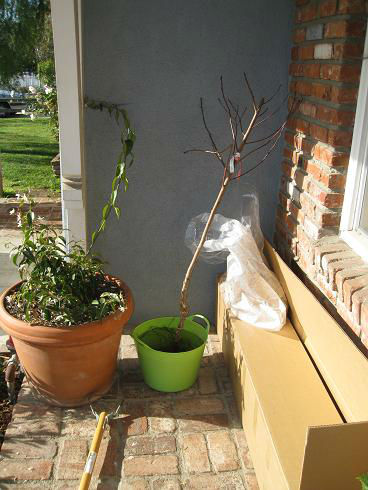
For those who have been tracking our landscaping project, you might recall there are 5 spaces for fruit trees in the front yard, and only 4 trees. On Christmas Eve, the final addition arrived via FedEx (upside-down, despite the multiple appearances of “up” arrows all over the box, thank you very much). Our Fantasia semi-dwarf nectarine arrived virtually safe and sound, with only a couple of broken branches.
Admittedly, I had never planted a bare root fruit tree before. All the trees I’ve grown either had a root ball wrapped in pot full of soil, or were already planted when I arrived. I’ve killed a couple bare root roses in the past, so my apprehension about doing the same for this little tree was at the forefront of my mind. Luckily the directions were clear and we followed them to the best of our ability on the day after Christmas.
We kept the tree outside because it was recommended to store it (if you can’t plant it right away) between 35-50 degrees. We soaked it overnight in water, as suggested, while we prepared the soil for planting.
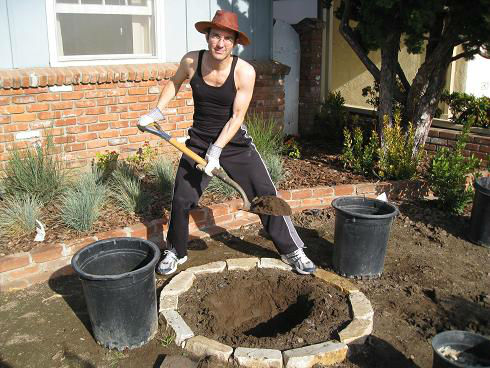
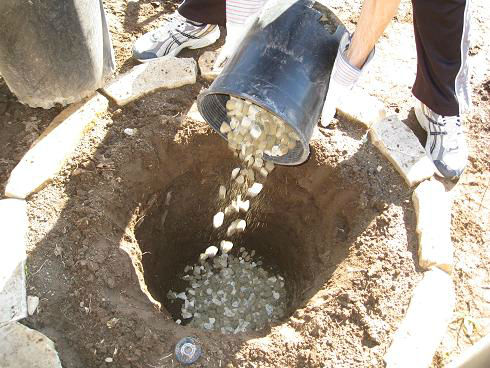
We dug a hole, and when I say “we” I really mean “my fabulous husband” dug a hole. There’s really only room for one person when digging a hole, I realized, so I took the opportunity to take pictures instead. Then, because of our clay soil and very slow drainage, we added some gravel to the bottom of the hole.
We loosened up the soil around the sides of the hole and amended some of the soil we dug out with some home grown compost. We added that on top of the gravel and formed a solid cone, over which to drape the roots.
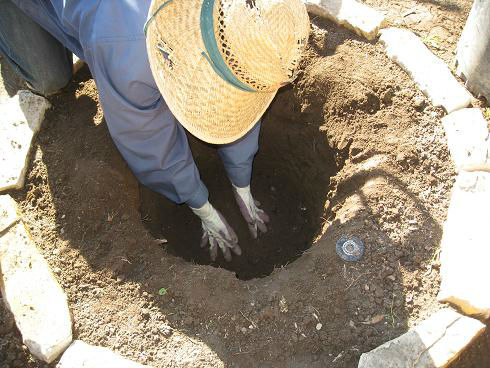
Our cone had to be moved when we realized that the root ball was not centered underneath the trunk of the tree. Since we wanted the tree trunk to be in the center of the stone ring, the root ball was going to have to be considerably off center to make up for it. Still, we were able to move the cone and drape the roots over the amended soil.
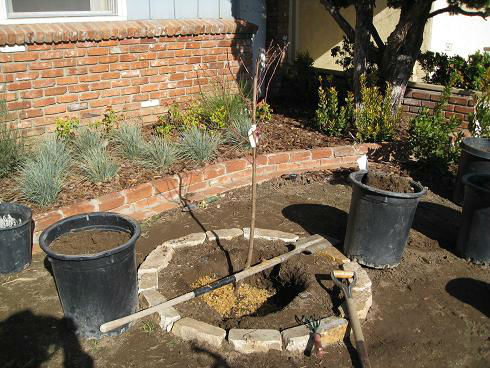
We extended a shovel across the surface to make sure we weren’t burying the tree too deeply. It was recommended to match the original planting depth (which could be determined by a change in color on the bark near the grafting point). We gently backfilled with amended soil, throwing in a handful of the sawdust that came in the bag surrounding the roots. The sawdust will compost eventually, and I sort of felt like burying the roots with something the tree had become familiar with over the last week. Call me esoteric, but I can’t help it.
Then we watered gently to fill in the air gaps in the soil. I then used floral tape to “repair” the broken branches (hey – it worked on my plum tree that broke while it was full of fruit, so I figured I’d give it a try).
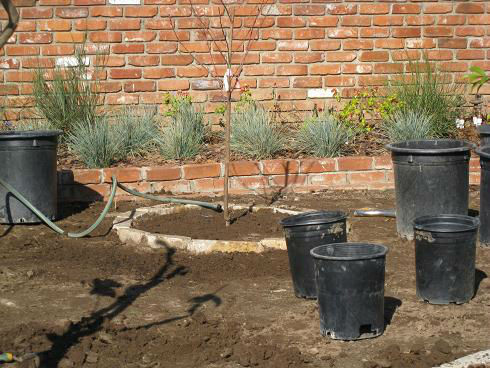
At present, my husband affectionately calls it “the stick” that’s planted in the front yard. Now we wait until spring to see if it comes out of dormancy and bears fruit. It is a two year old tree, so we are hopeful that it will produce fruit in its first year with us. Cross your fingers with me! To be continued…
Really fine blog and interesting advice !
ciao from Tuscany
Italy
I wish you all the best luck with your new “stick” nectarine tree! If you can resist temptation and refrain from harvesting fruit from the tree during its first year during establishment, so much the better for the long-term health of the tree. You want it to direct energy to root development. Moreover, most grafted cultivars of fruit trees won’t bear until year 3.