Do you ever have one of those moments when you realize that you probably should have done something in a different order than you’ve done it? Well, such is the case with our raised bed project this weekend. Our neighbor, a retired contractor, stopped by to see what all the sawing and hammering was about. He took one look at our beautiful grouping of raised beds and said, “you’re gonna need a border to level all that dirt.” As much as I wanted to ignore his words, I knew he was right. The area where the old raised beds stood was about 2 inches higher than the pathways surround it. I was figuring the whole thing would just work itself out – and level itself out without help from us, but it was becoming apparent that we were having no such luck.
So we made another trip to the hardware store for some plantation harvested redwood (because ordering more Trex would have set us back another week) and we found ourselves digging trenches for a border on all four sides. Now let me just say out loud and with head bowed low that we are not experts in this particular arena of construction. On a task that really need survey equipment, several questions arose as we attempted to make a giant square in the middle of the garden:
How the heck do you know if your square is actually straight? (This question came up after we noticed that neither the perimeter fence nor the shack/office next to the garden were very reliable structures from which to base measurements.)
Is “level” an arbitrary term in this project, or should we acknowledge the fact that this yard slopes toward the house? In the end, we did our best to make each board level, with a little forgiveness in one corner that just confounded us.

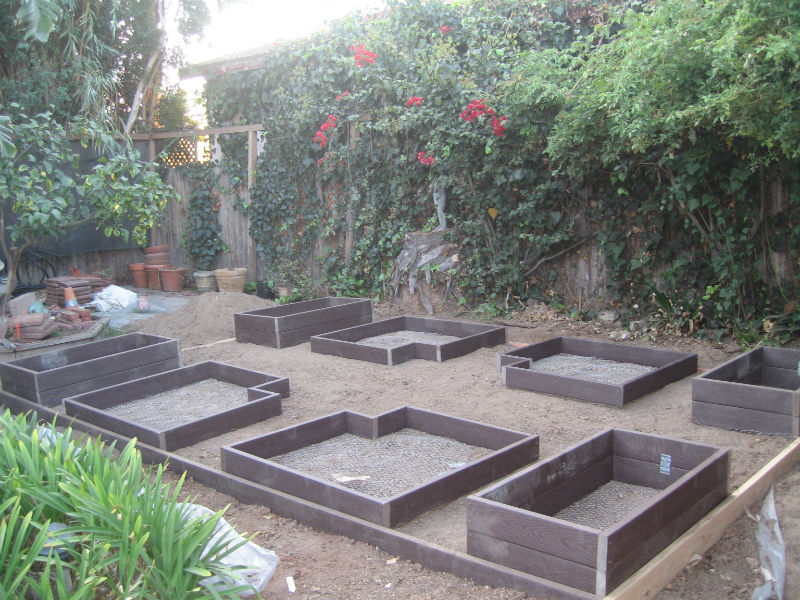
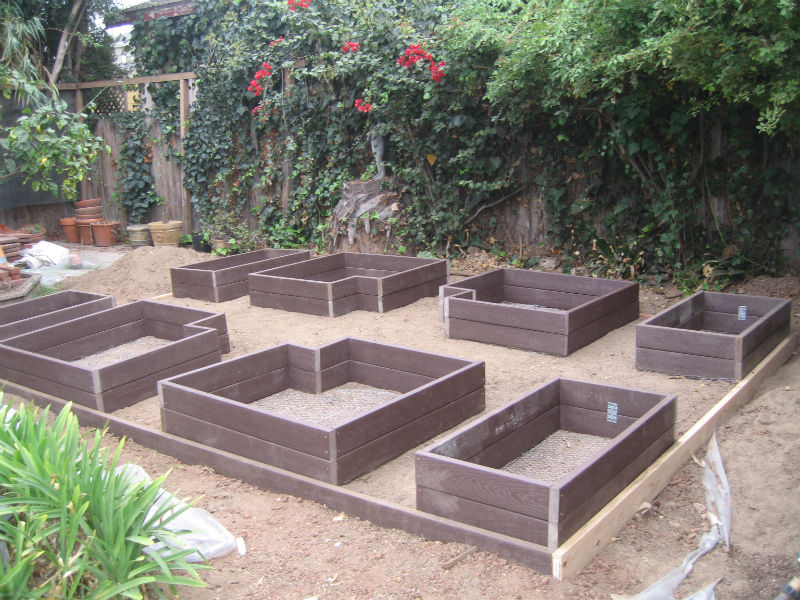
Once we felt confident that we had made the border as level as possible, and square as possible, we backfilled the perimeter from the outside first, then the inside. My husband used one of the beds as a leveling plow (for lack of a better word) and he dragged the bed over the surface of the entire area to rake it smooth, and hopefully level the soil. It actually worked pretty well, but we still had some individual leveling to do once we placed the beds back in place.
Then we finished assembling the remaining beds and moved them into place on top of their foundations. Here is the finished product at the end of the day.
If I do say so myself, it’s a thing of beauty. We still a little more work to do, including joining the top and bottom layers with mending plates and 1/2 steal piping. Then, of course we move on to building the perfect soil for these beautiful beds. More to come on that later!
Do you have any projects going on in your fall garden? Share them here?


Pingback: Gardenerd: Organic Edible Gardening | Garden on the Rocks
Pingback: Gardenerd: Organic Edible Gardening | Raised Beds - Part 3 - If you build it...Gardenerd: